You can view the list of the events you have created, edit the details of the event, set the recurrence patters and also set a price for the event.
Logged in as a user, click on List Events link, under Events menu:

The Events Calendar page will appear as you can see in the picture below:
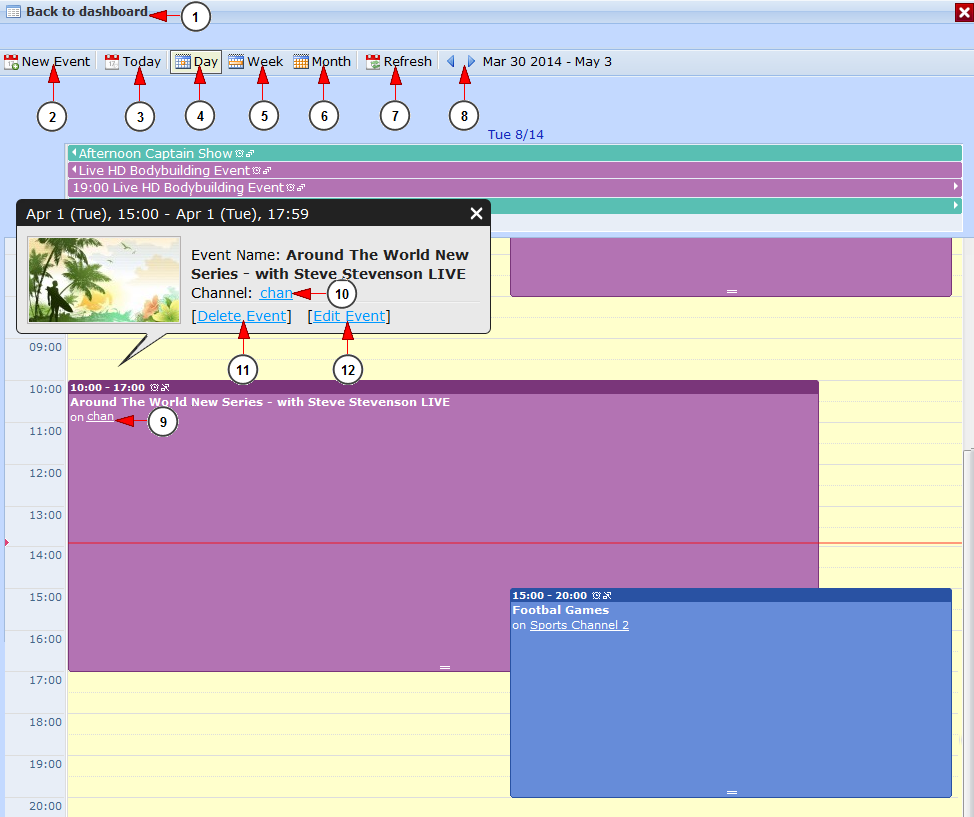
1. Click here to go back to dashboard.
2. Click here to create a new event.
3. Click here to view events schedule for today.
4. Click here to view events schedule for a single day.
5. Click here to view events schedule for a week.
6. Click here to view events schedule for a month.
7. Click here to refresh the page.
8. Click on the arrows to go backwards or forward in time.
9. Click on the event to see more details about it.
10. Here you can see the channel name.
11. Click here to delete the event.
12. Click here to edit the event.
Edit event details
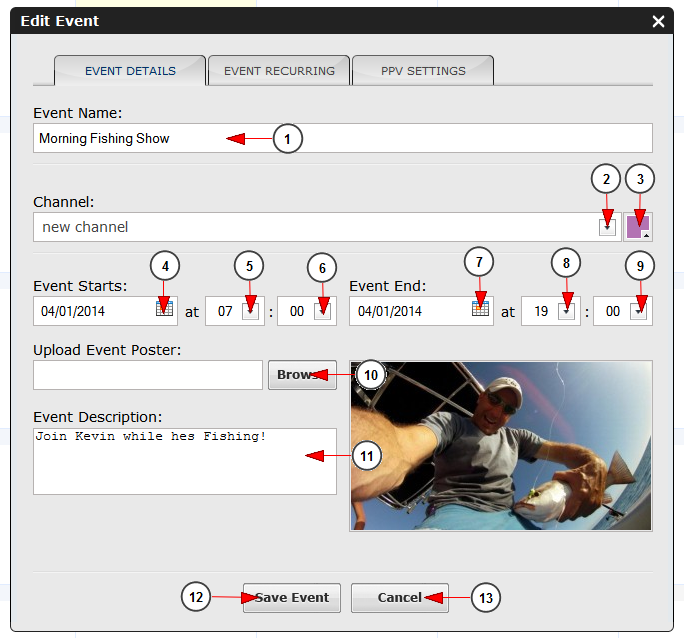
1. Click here to insert the event name.
2. Click on the drop down list to choose the channel in which your event will appear.
3. Click to choose a background color for your event.
4. Click on the calendar to select a date for the beginning of your event.
5. Click on the drop down list to select the hour when the event starts.
6. Click on the drop down list to select the minute of the hour when the event starts.
7. Click on the calendar to select a date when the event ends.
8. Click on the drop down list to select the hour when the event ends.
9. Click on the drop down list to select the minute of the hour when the event ends.
10. Click to browse in your computer a logo picture for your event.
11. Click here to insert a description of the event you are creating..
12. Click the button to save event.
13. Click the button to cancel the details of the event.
Event recurring
Click on the event recurring button on the header of the window to make the settings you prefer for your event:
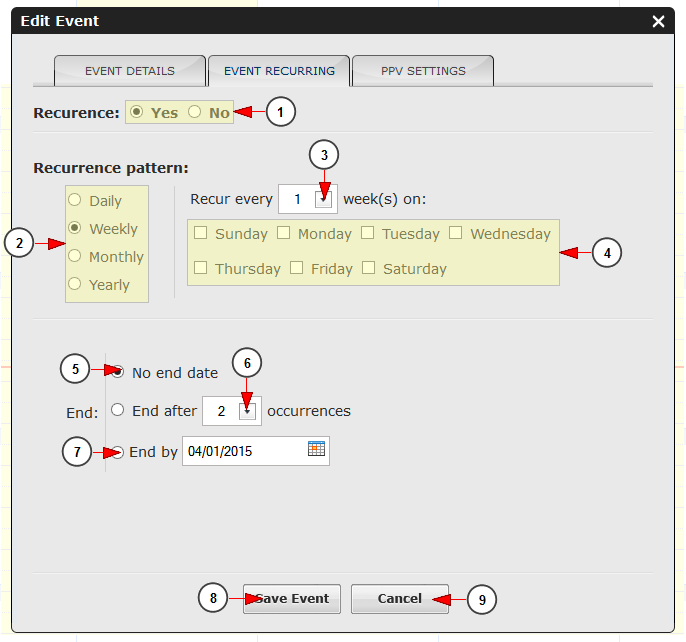
1. Check the Yes radio button to create a recurring event or the No radio button if you do not want the event to be recurring.
2. Click the radio button which corresponds to the recurrence pattern you want: daily, weekly, monthly, yearly
3. Click on the drop down list to select if you want the event to recur every day/week/month or year.
4. If you selected a weekly event you can also select a specific day your want the event to take place by checking the desired box.
5. Check the radio button if you don’t want to set an end date of your event.
6. Choose from the drop-down menu the number of occurrences of the event.
7. Check this radio button to select and exact date for the event to end. Click on the calendar to choose the end date of your event.
8. Click the button to save the details for the event.
9. Click the button to cancel the settings you made.
PPV settings
Click on the PPV settings button from the header part of the window to set the options you want for the event:
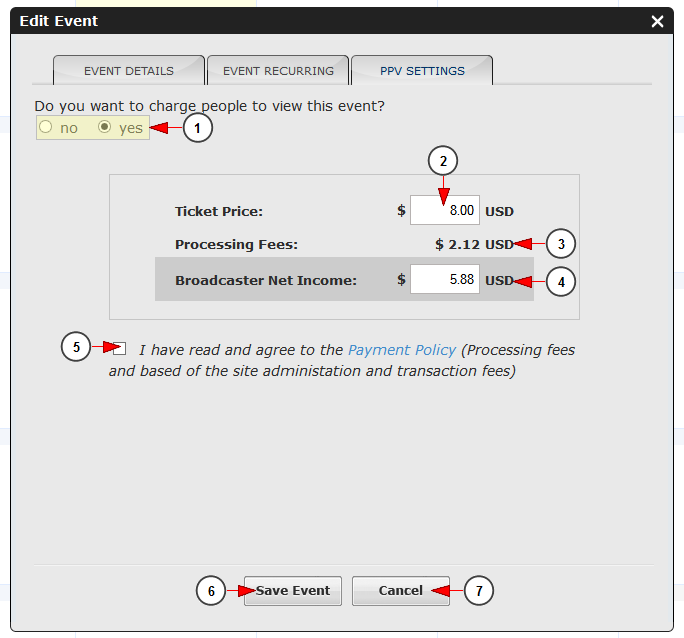
1. Check the Yes radio button if you want to set a price for the event or the No radio button if you want the event to be free.
2. Insert the ticket price for the event.
3 Here you can see the processing fees for the ticket price.
4. Here you can see the net income you will get.
5. Check this mandatory box to agree with the payment policy.
6. Click here to save event settings.
7. Click here to cancel the settings.