Private channels can be watched by NKTelko registered users based on using either their credentials provided upon registering with the platform, or by using the code provided by Roku box when adding a new device.
Important: if a broadcaster wants to publish a channel on Roku, he needs to have a Roku developer account. Private channels are published immediately, without waiting for Roku to approve them.
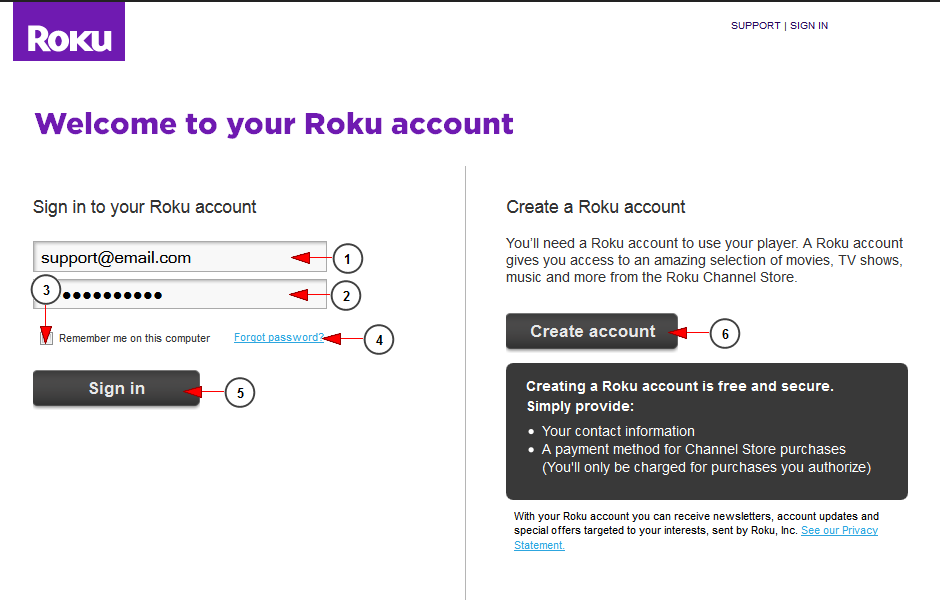
Once you have a Roku developer account, log into it in order to publish a private channel:
1. Type your Roku account email address.
2. Enter your password.
3. Check this box so that the application remembers your credentials.
4. Click here in case you forgot your password.
5. Click here to sign in.
6. Click here to create a new account.
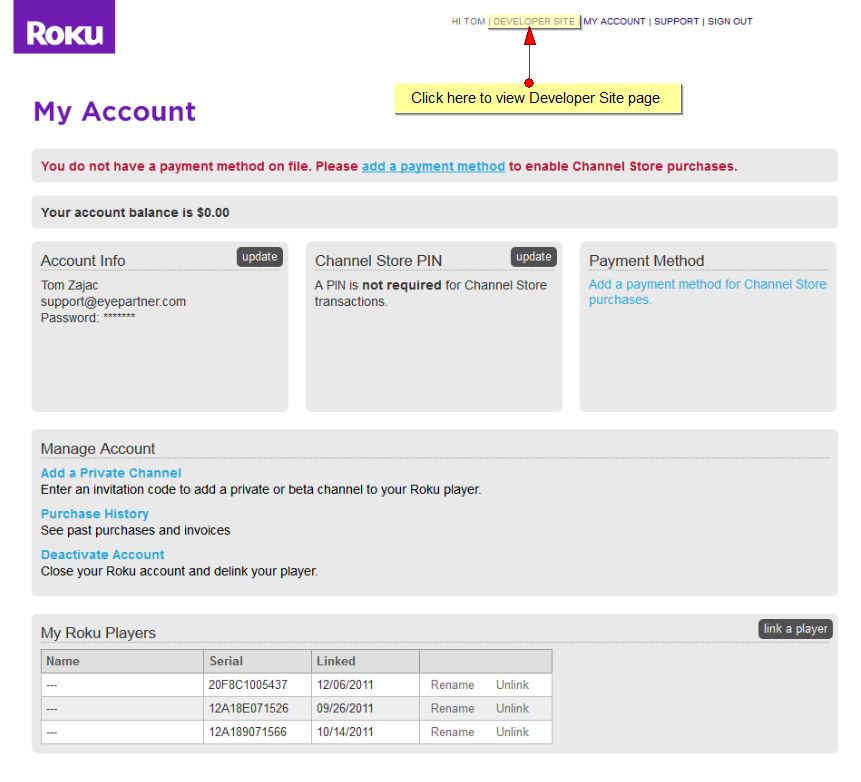
One you’re logged in the application, click on the Developer Site page:
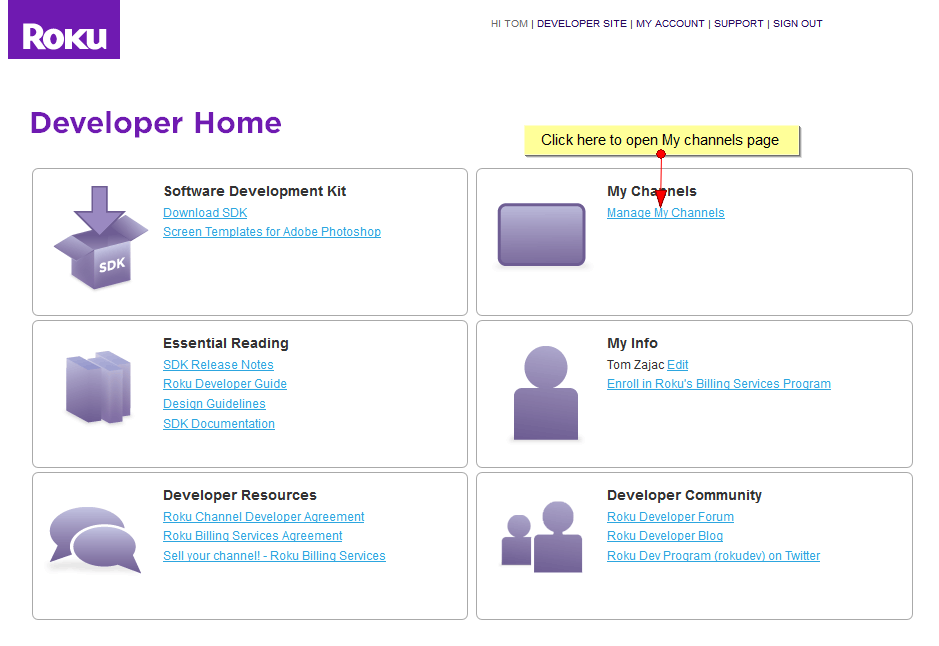
When the Developer Site page opens, you have to click on My Channels page in order to manage your channels:
On My Channels page you can add a a private channel:
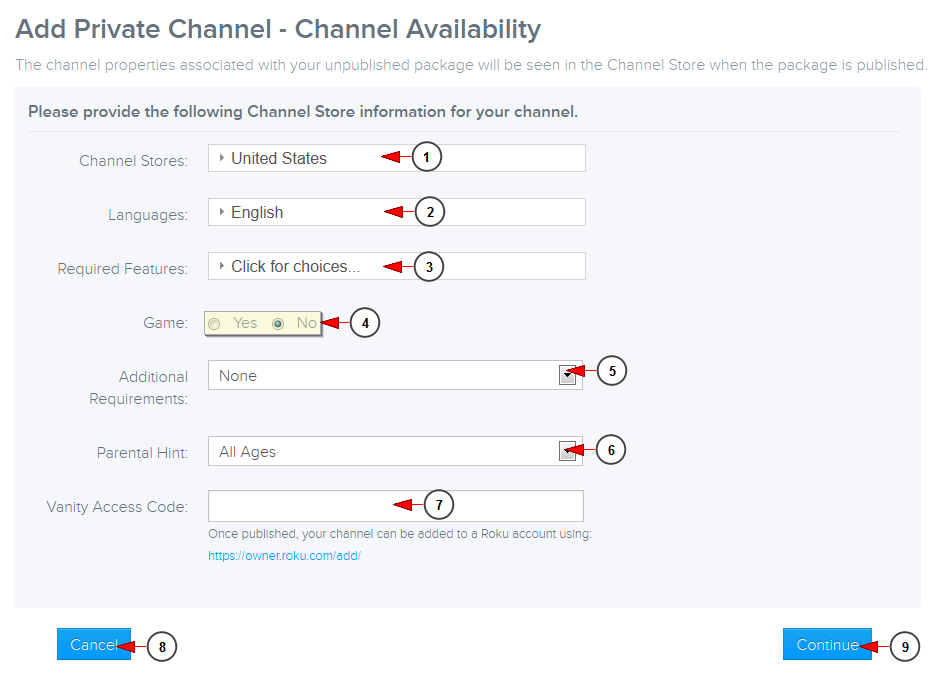
Once you click Add a private channel, the following page will open:
1. Select from the drop down menu, the countries or regions where you want your channel to be displayed.
2. Select the language for which you will supply channel descriptions.
3. Select the model features required for your channel, like: USB Support, Roku 2, Roku 3, Screensaver, Roku game remote.
4. Check the Yes radio button if your channel is a game or check the No radio button if it is not a game.
5. Select from the drop-down menu is your channel requires any additional fees.
6. Select from the drop-down menu is your channel is appropriate for all ages.
7. Insert here a vanity code for your channel (optional).
Note: the Vanity access code can be added or deleted anytime from Edit channel properties page.
8. Click here to cancel creating a channel.
9. Click here to continue creating a channel.
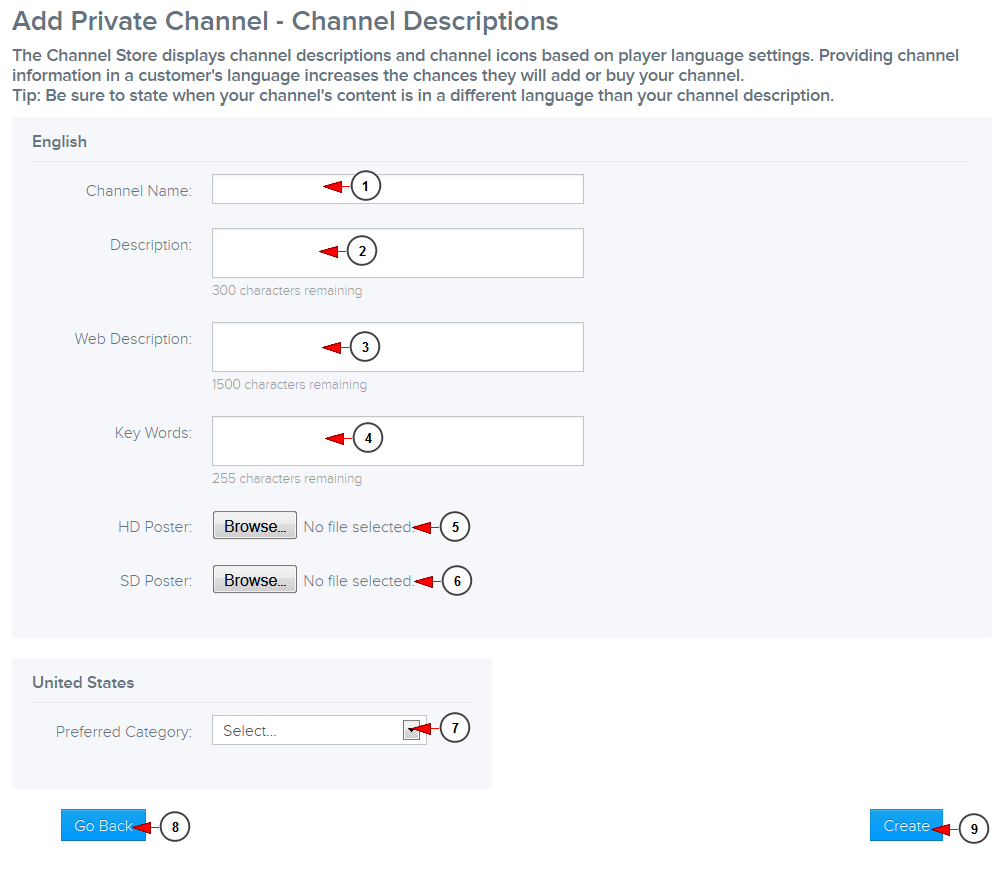
Once you clicked the Continue button, you will be asked to provide more channel details:
1. Insert here the channel name that will be displayed on your Roku Channels Lineup.
Note: private channels are displayed on Roku Channel Lineup only for users who have the access vanity code.
2. Insert here a channel description that will be displayed under the name of your channel.
3. Insert here a web description that will be displayed only on the web and not on Roku.
4. Insert here different keywords for your channel to be found on search.
5. Browse in your computer the HD poster of the application.
Note: the picture must be a JPEG type with the size 290 x 218 pixels.
6. Browse in your computer the SD poster of the application.
Note: the picture must be a JPEG type with the size 214 x 144 pixels.
7. Select from the drop-down menu the desired category for your channel.
8. Click here to go back to the previous page.
9. Click here to continue the channel creating process.
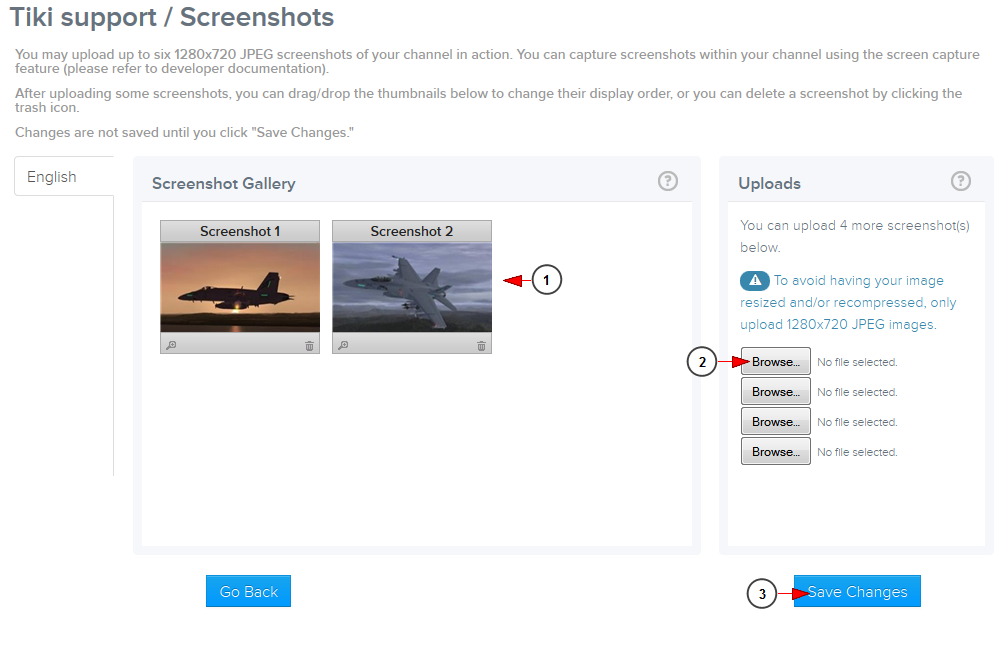
In the next phase, you will be asked to upload some screenshots of your channel in action:
1. Here you can see the screenshots gallery you created.
2. Click here to upload the screenshots from your computer.
3. Click here o save the changes.
Once the channel is created you can go back to Manage Channels page and edit the settings:
Once the Channel Details page opens, you can select to edit the channel:
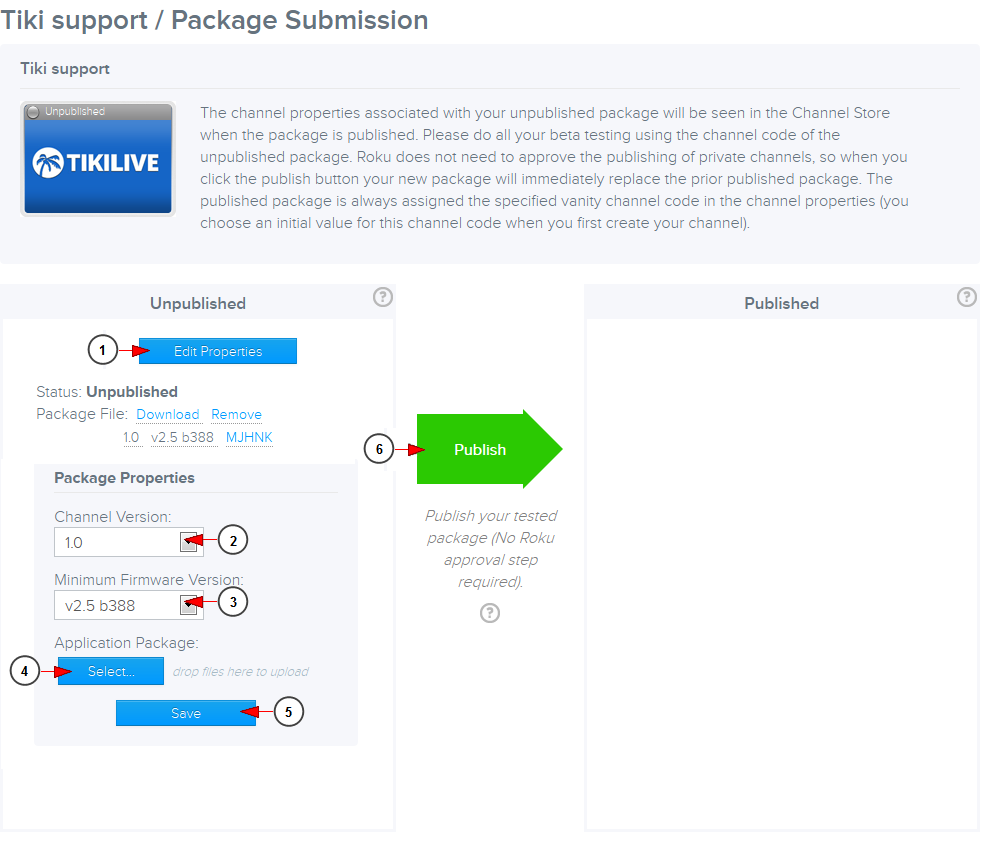
The Package Submission page will open:
1. Click here to edit the channel properties.
2. Select from the drop-down menu a channel version.
3. Select from the drop-down menu the minimum firmware version.
4. Click here to select the Roku application package provided by NKTelko.
5. Click here to upload the Roku application package.
6. Click here to submit your channel to Roku for publishing.
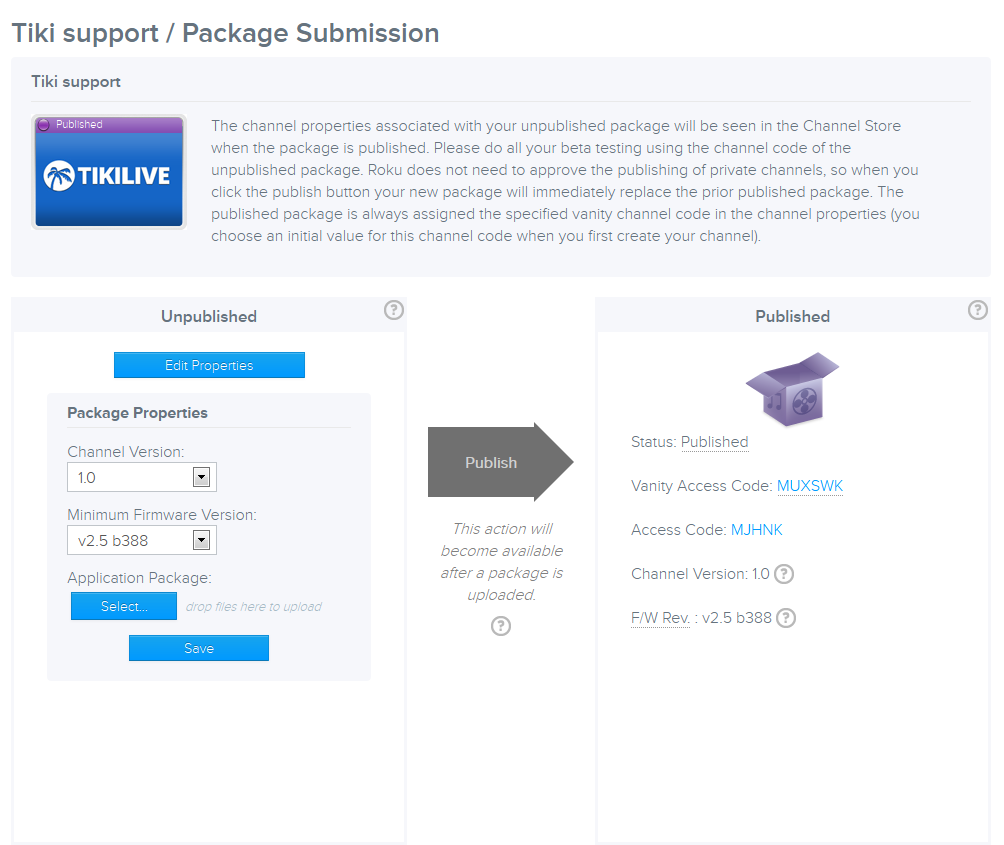
The channel will be published instantly, without any approval:


