In Live Channels Statistics page, users are able to view the viewers and bandwidth statistics for a desired channel.
Click on Live Channels Statistics page, under Statistics menu:
Once the page opens, you can select the desired channel and the filter the time period and the graphic will be displayed below:
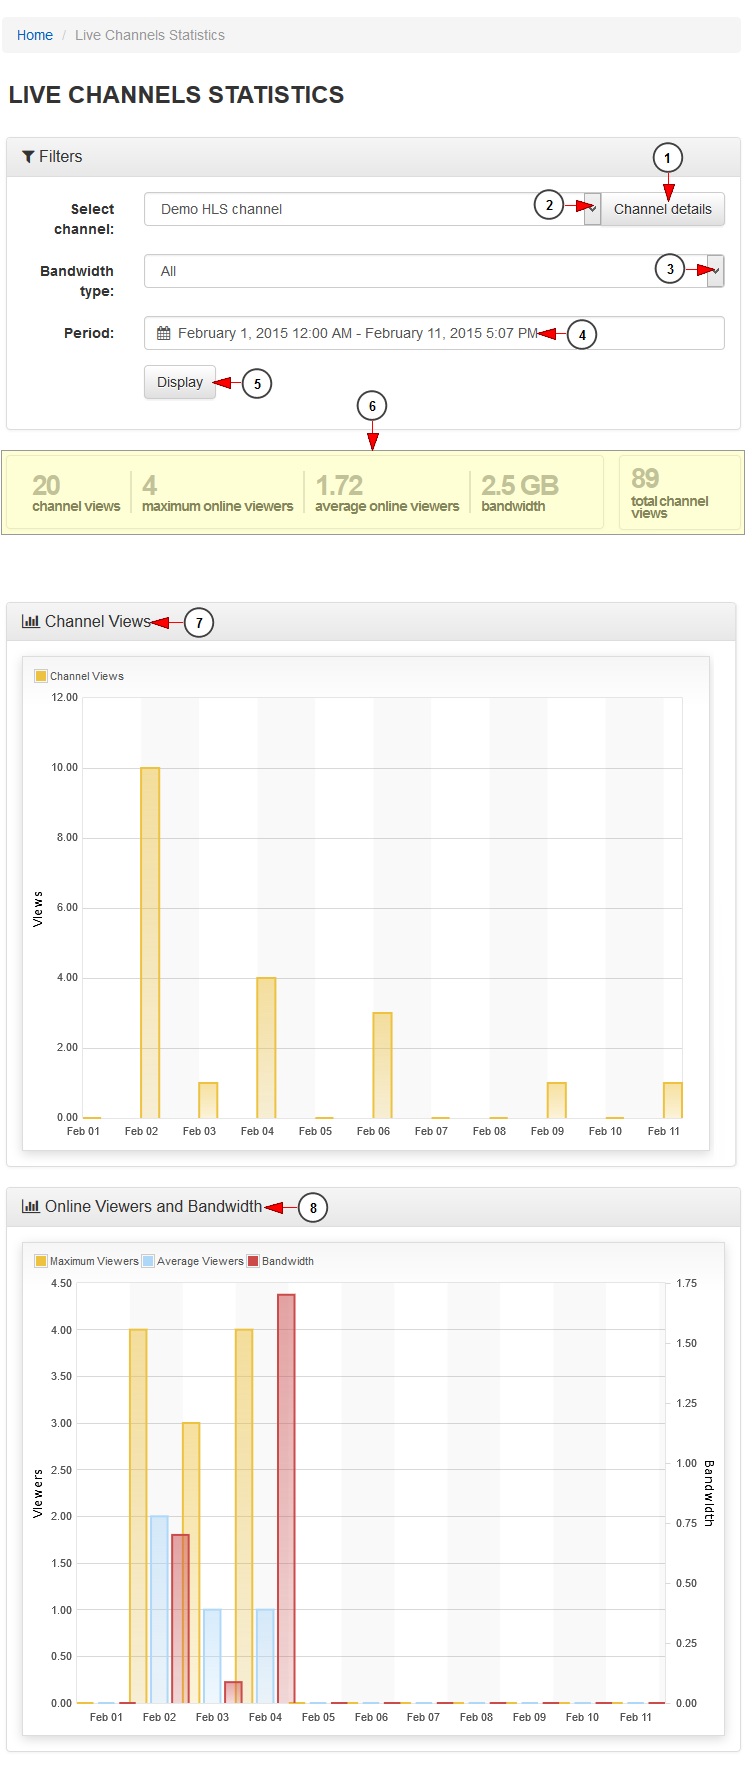
1. Click here to view the channel details. You will be redirected to Edit channel details page.
2. Select from the drop-down menu the desired channel.
3. Select from the drop-down menu the bandwidth type: web, HTML5, STB or Roku.
4. Click here to select the desired period of time. A calendar will open and you can filter the date range for the graphic display.
5. Click here to display the graphic for the selected time period.
6. Here you can see details related to the selected channel.
7. Here you can see the graphic with the channel views for the selected period of time.
8. Here you can see the viewers and bandwidth graphic.
Note: Viewers are calculated as session ids and are incremented once a new session is started from the channel page or embed code.
Time filter calendar
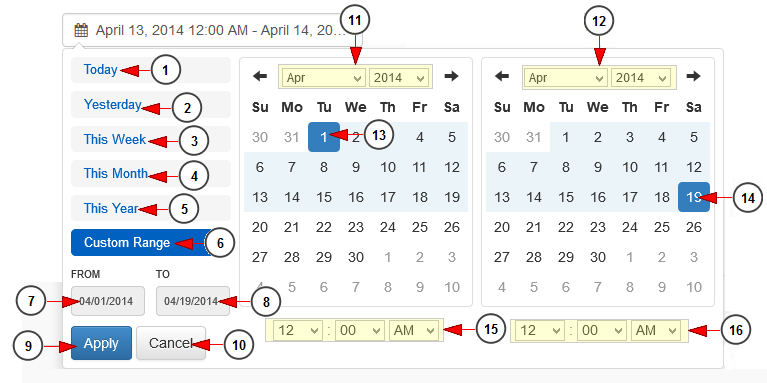
1. Click here to select the current day to view the bandwidth usage graph.
2. Click here to select the previous day to view the bandwidth usage graph.
3. Click here to select the current week to view the bandwidth usage graph.
4. Click here to select the current month to view the bandwidth usage graph.
5. Click here to select the current year to view the bandwidth usage graph.
6. Click here to select a custom range to view the bandwidth usage graph. The 2 calendars will be displayed like in the picture above.
7. Click here to select a start date for the date range filter.
8. Click here to select an end date for the date range filter.
9. Click here to apply the selected dates.
10. Click here to cancel selecting a custom range period.
11. Select from the drop-down menus the desired month and year for the start date.
12. Select from the drop-down menus the desired month and year for the end date.
13. Click on the desired day of the calendar to select the start date.
14. Click on the desired day of the calendar to select the end date.
15. Select from the drop-down menus the exact hour and time for the start date.
16. Select from the drop-down menus the exact hour and time for the end date.