Important: this page is related to MarketPress plugin.
Users who create new WordPress sites have the “Store” page created when they first access the WordPress dashboard.
Users who have older WordPress sites have to create this “Store” page, since the Plugin has been installed after their WordPress site was created.
In order to create “Store” page and then customize it with Products, please follow the steps described below.
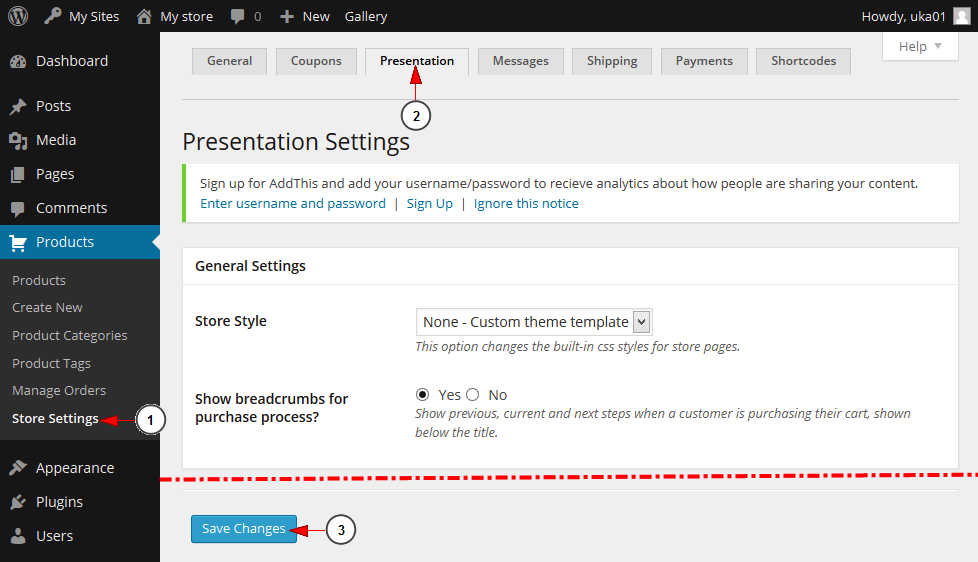
To activate “Store” page, users simply need to Save the Store Presentation settings.
1. Click on Store Settings link to open the page.
2. Click on Presentation tab to view the Presentation Settings page.
3. Click the Save Changes button to activate “Store” page.
Note: there is no need to customize any settings on presentation page to activate “Store” page. All you need to do is to save the settings on this page.
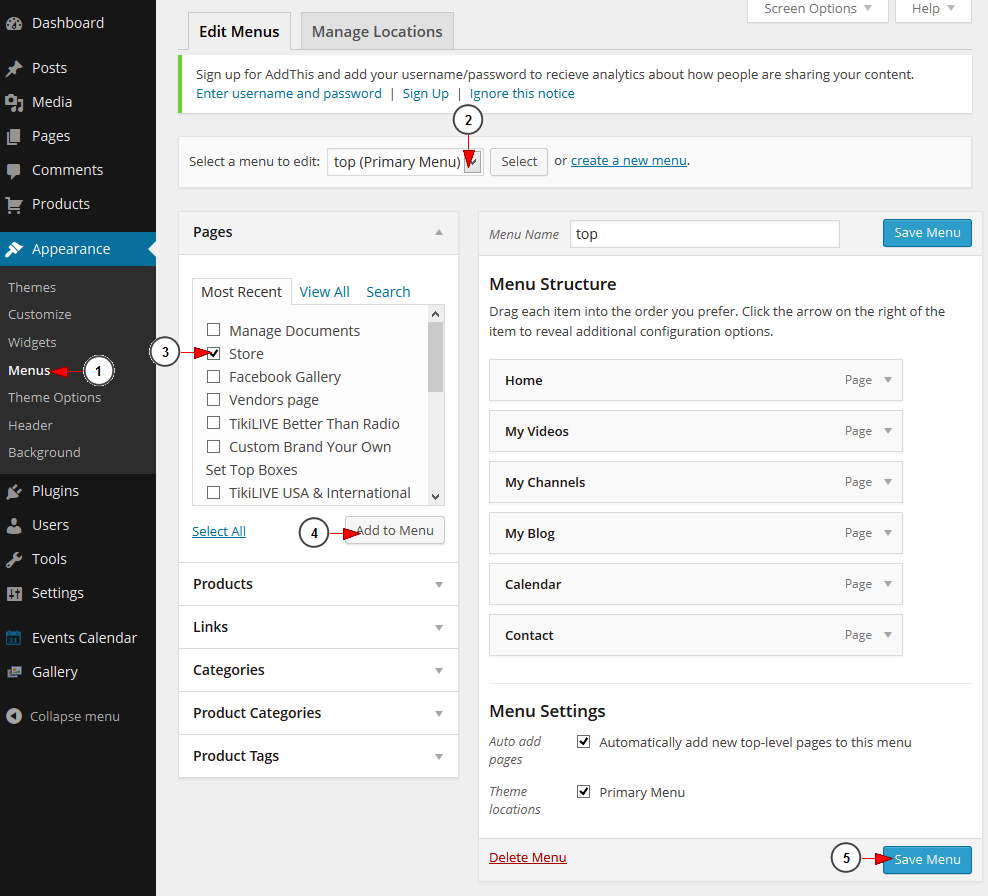
The “Store” page will be created and you can add it to the Menu so that it will easily accessed by all users.
1. Click on Menus link to open the page.
2. Select from the drop-down menu the Top menu.
3. Check this box to select “Store” page.
4. Click Add to Menu button to add the “Store” page to the top menu.
5. Click here to save the changes on the menu.
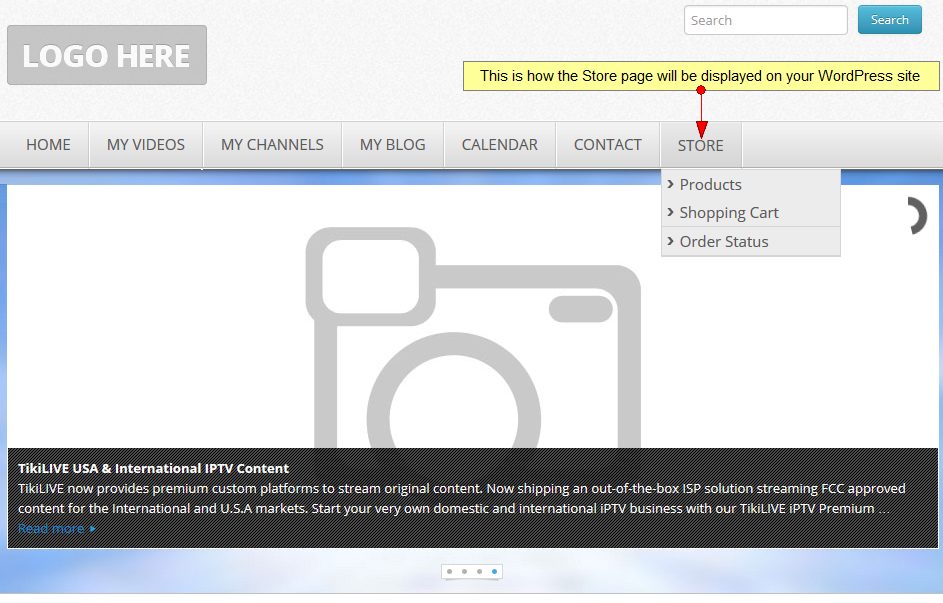
The “Store” pages will be displayed on the Top menu of your WordPress blog, as exemplified in the picture below:


