Note: this page is related to 3rd party AddThis Share plugin. This plugin is available only on Church Responsive and Rock On Responsive themes.
AddThis Share plugin helps drive traffic to your site by helping visitors share, bookmark and email your content to over 330 services.
Click on AddThis Share link under Settings page:
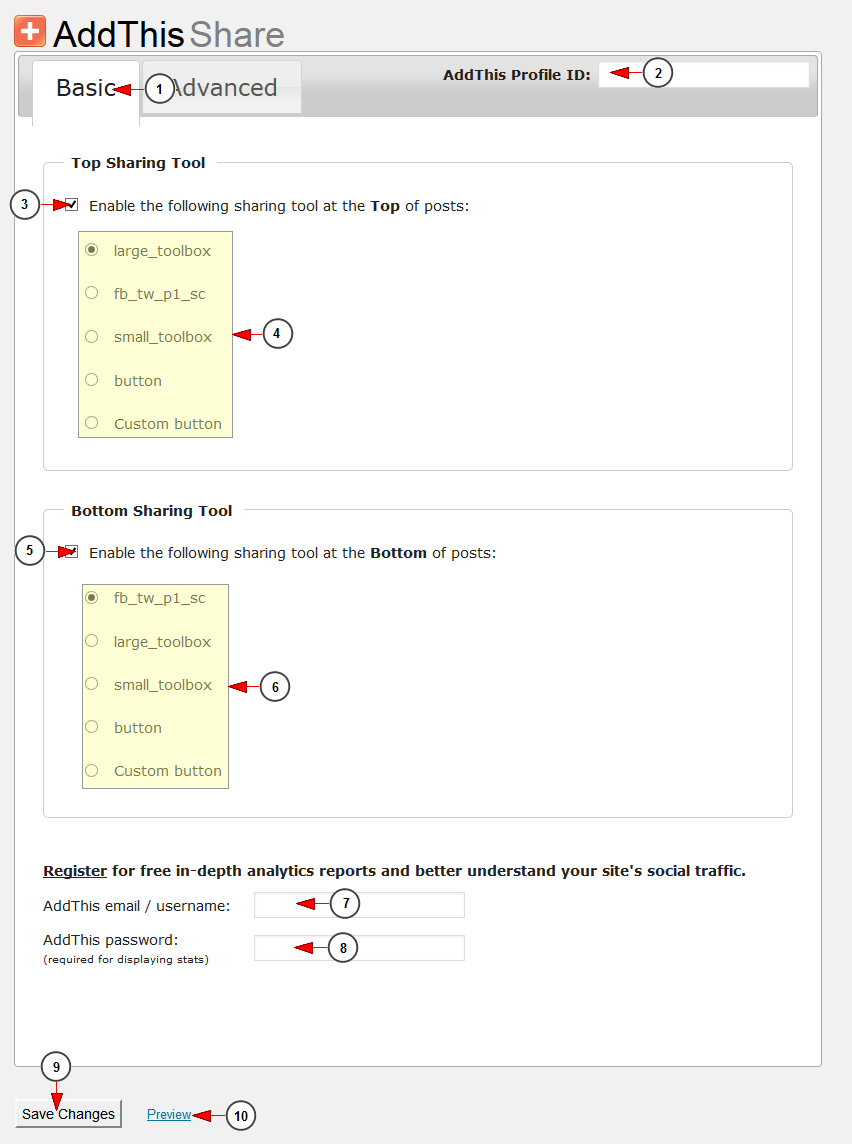
Once the page opens you can configure the Basic settings for this plugin:
1. Click here to configure the Basic settings for AddThis plugin.
2. Insert here the AddThis Profile ID.
3. Check this box to enable the sharing tool at the Top of WordPress posts.
4. Check the radio button to select the desired sharing tool.
5. Check this box to enable the sharing tool at the Bottom of WordPress posts.
6. Check the radio button to select the desired sharing tool.
7. Insert here the AddThis email or username to register for analytics reports.
8. Insert here the AddThis password.
9. Click here to save the settings.
10. Click here to Preview the plugin changes on the web blog.
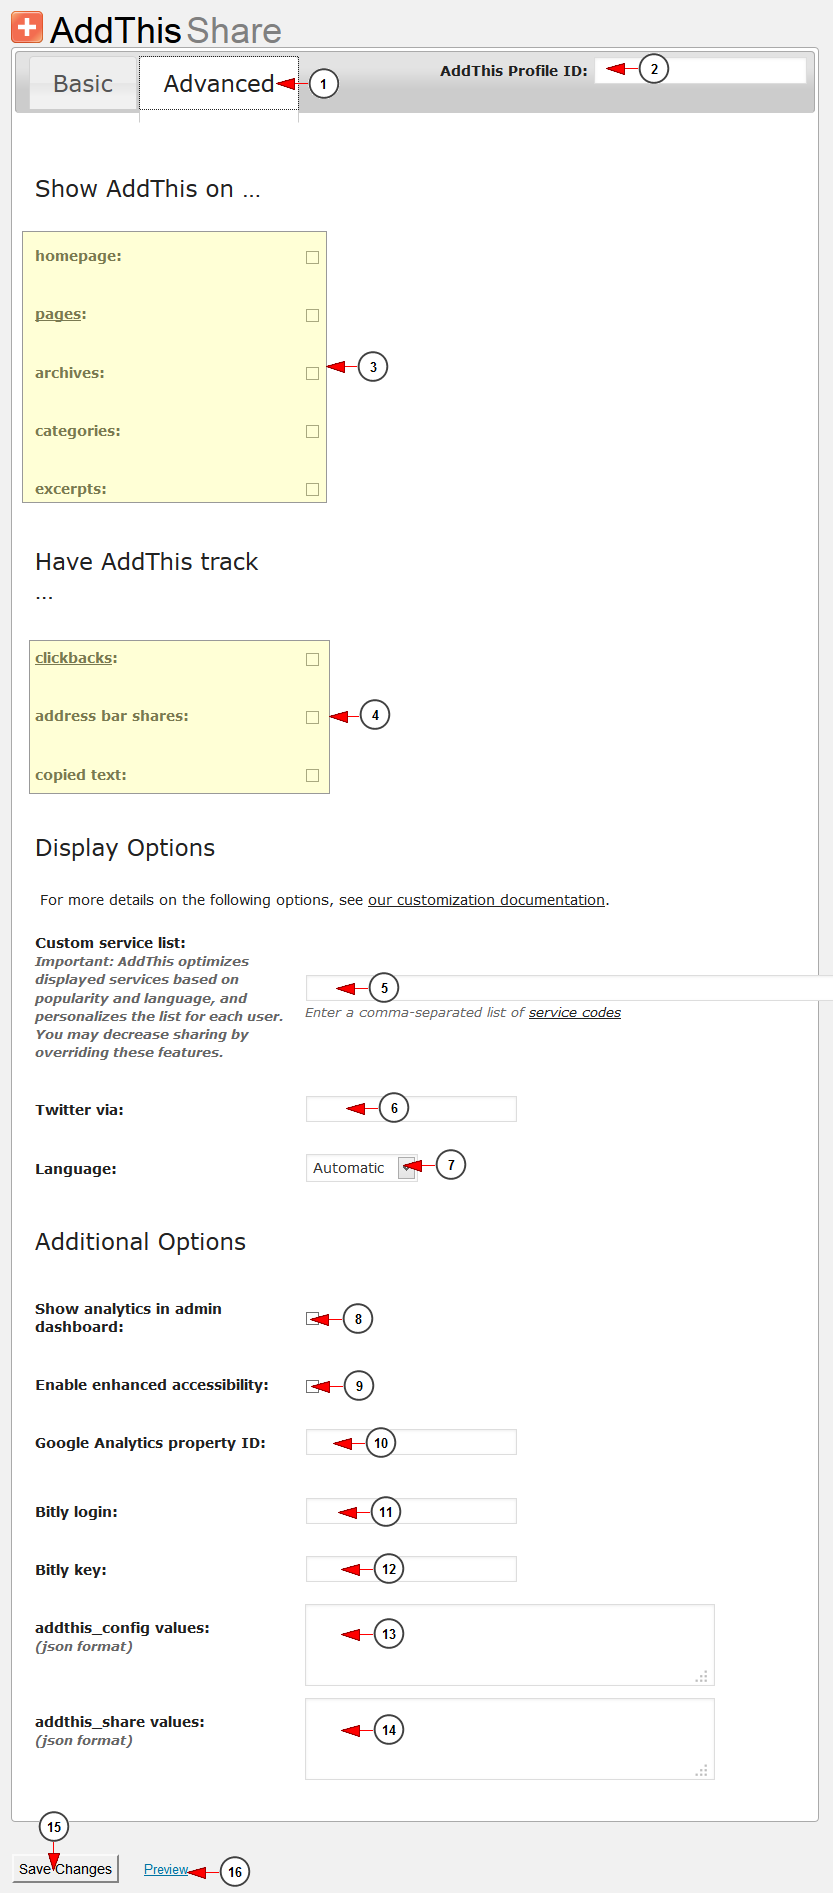
WordPress users also have the possibility to edit the Advanced settings for this plugin:
1. Click here to configure the Advanced settings for AddThis plugin.
2. Insert here the AddThis Profile ID.
3. Check the boxes to select the section where you want the plugin to be displayed.
4. Check the boxes to select the tracking settings for this plugin.
5. Enter here the 3rd party service codes separated by comma.
6. Insert here the Twitter link.
7. Check this box if you want to show analytics in admin dashboard.
8. Select from the drop-down menu the desired language for this plugin.
9. Check this box if you want to enable enhanced accessibility.
10. Insert here the Google Analytics property ID.
11. Insert here the Bitly login.
12. Insert here the Bitly key.
13. Insert here the addthis_config values in json format.
14. Insert here the addthis_share values in json format.
15. Click here to save thechanges.
16. Click here to preview the changes.


